AI links open with a title + excerpt (these tools can't fetch the page themselves) — use "Copy full article" to paste the complete text for a fuller summary.
Share:
In this article, we are going to:
Create a database.
Create stored procedures.
Create a WPF application in VB.NET.
Perform CRUD operations.
Create a Database
Open SQL Server 2016. Then, click the New Query window and run the below query.
USE [test]
GO
/****** Object: Table [dbo].[EmployeeMaster] Script Date: 5/7/2017 8:07:35 AM ******/
SET ANSI_NULLS ON
GO
SET QUOTED_IDENTIFIER ON
GO
CREATE TABLE [dbo].[EmployeeMaster](
[Id] [numeric](18, 0) IDENTITY(1,1) NOT NULL,
[EmployeeCode] [bigint] NULL,
[EmployeeName] [varchar](150) NULL,
[EmployeeDob] [datetime] NULL,
[EmployeeAddress] [varchar](500) NULL
) ON [PRIMARY]
Create Stored Procedures
You've probably used Entity Framework, but I have written the stored procedure for my data operations, so run the below SP.
CREATE PROCEDURE [dbo].[EmpMaster_SP]
@ID NUMERIC(18,0)=NULL,
@EmpCode BIGINT=NULL,
@EmpName VARCHAR(150)=NULL,
@DOB DATETIME=NULL,
@Address VARCHAR(500)=NULL,
@Mode VARCHAR(10)
AS
BEGIN
SET NOCOUNT ON;
IF (@Mode='ADD')
BEGIN
INSERT INTO EmployeeMaster (EmployeeCode,EmployeeName,EmployeeDob,EmployeeAddress)
VALUES(@EmpCode,@EmpName,@DOB,@Address)
END
IF (@Mode='EDIT')
BEGIN
UPDATE EmployeeMaster SET EmployeeCode=@EmpCode,EmployeeName=@EmpName,EmployeeDob=@DOB,EmployeeAddress=@Address WHERE ID=@ID
END

IF (@Mode='DELETE')
BEGIN
	DELETE FROM EmployeeMaster WHERE ID=@ID

END
IF (@Mode='GET')
BEGIN
	SELECT Id,EmployeeCode,EmployeeName,CONVERT(VARCHAR(10), EmployeeDob)EmployeeDob,EmployeeAddress FROM EmployeeMaster

END
IF (@Mode='GETID')
BEGIN
	SELECT Id,EmployeeCode,EmployeeName, EmployeeDob,EmployeeAddress FROM EmployeeMaster WHERE ID=@ID

END
Create a WPF Application in VB.NET
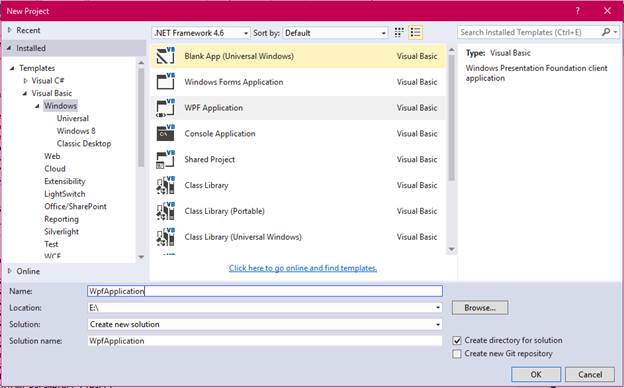
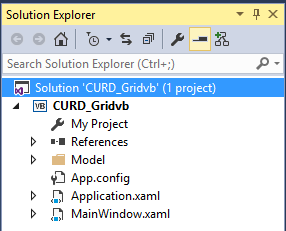
Open Visual Studio 2015. Go to New Project > Visual Basic (under templates) > W_PF Application_. After creating the application, open the Solution Explorer, which appears like the below image. Now, we are ready to create our design screen. Here, I am using simple WPF controls:
Textbox.
Rich textbox.
Button.
Datagrid.
Label.
Date picker.
Then, write the following XAML code in MainWindow.xaml file.
 After creating the application, open the Solution Explorer, which appears like the below image. Now, we are ready to create our design screen.
  Here, I am using simple WPF controls: