Learn Host ASP.NET Core – Web API (RESTful) in Azure App Service
AI links open with a title + excerpt (these tools can't fetch the page themselves) — use "Copy full article" to paste the complete text for a fuller summary.
How to Host an ASP.NET Core Web API in Azure App Service
In this blog, we will learn how to host an ASP.NET Core Web API in Azure App Service step by step. By the end of this guide, your API will be live and accessible through Azure.
Prerequisites
- Visual Studio
- Azure Account
Note: This demo uses a project that was already created. Please refer to the previous blog post for the project setup: Learn ASP.NET Core MVC with MSSQL using Dapper ORM RESTful
Step 1: Open Your Project in Visual Studio
Open the existing ASP.NET Core Web API project in Visual Studio.
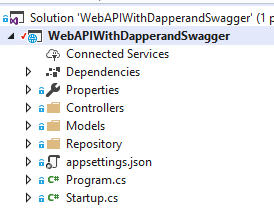 Figure 1 – Project opened in Visual Studio
Step 2: Publish the Project
Right-click on the project solution and select Publish from the context menu.
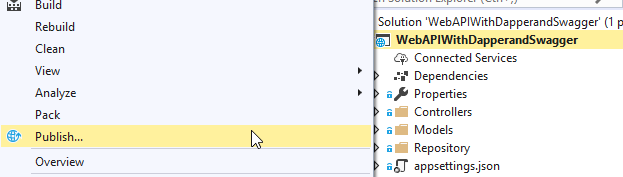 Figure 2 – Selecting Publish from the solution menu
Step 3: Configure the Publish Target
First, make sure your Azure account is signed in to Visual Studio. The Pick a publish target dialog will appear. Follow these steps:
- Select the App Service tab
- Choose Create New
- Click Advanced to open the advanced settings popup
- Fill in the required settings
- Click Save, then click the Publish button
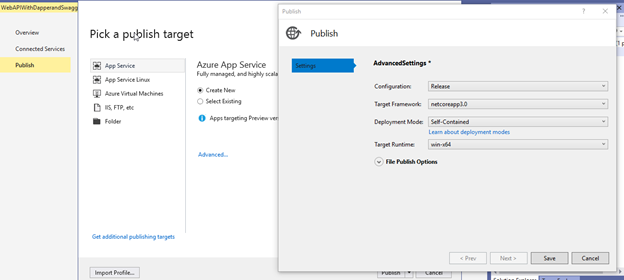 Figure 3 – Publish target and advanced settings
Step 4: Set App Service Details
Provide the following information for your App Service:
- App Service Name
- Resource Group
- Hosting Plan
Tip: It is recommended to enable Application Insights for production deployments. It helps you monitor performance, track errors, and analyze usage.
 Figure 4 – App Service name, resource group, and hosting plan
Step 5: Skip SQL Database Creation
Since a SQL Server database has already been created, you can skip the SQL Database creation step in this wizard.
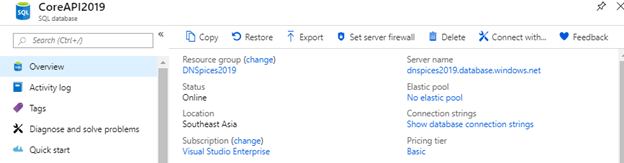 Figure 5 – Skipping SQL Database creation
Step 6: Deploy the Application
Click the Create button to start the deployment. You can track the progress in the Output window. Once the deployment is complete, the live site URL will be displayed at the top.
 Figure 6 – Deployment completed successfully
Troubleshooting: HTTP Error 500.0
After deployment, you may notice an HTTP Error 500.0 when you visit the site URL. This is a common issue with ASP.NET Core apps hosted on Azure.
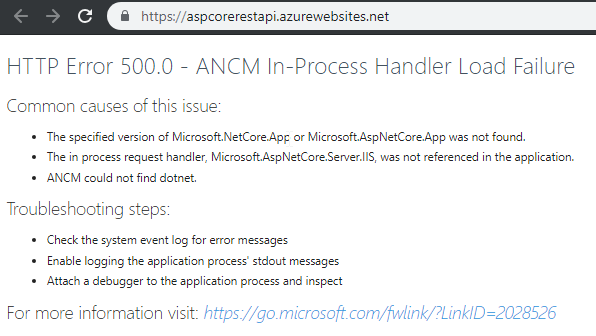
Fix: Add a web.config File
To resolve this error, add a web.config file to your project and include the required XML configuration inside it.
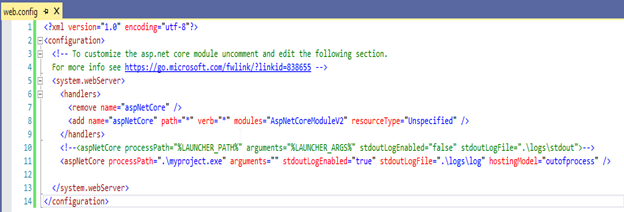
Once the file is added, Publish the application again.
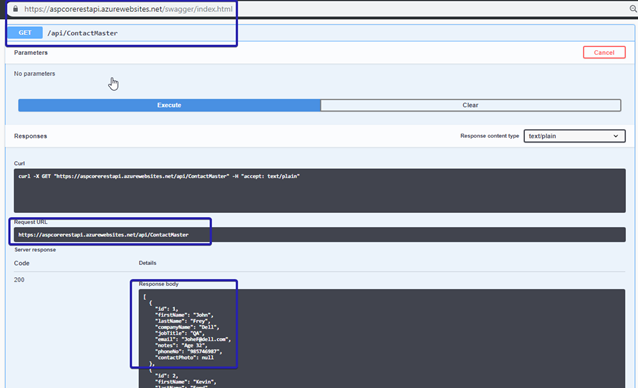 Figure 9 – Republishing with web.config
Step 7: Verify the API is Live
Your RESTful API Web Service is now live and ready to use. This project uses Swagger UI, which makes it easy to browse and test all the available API endpoints directly from the browser.
Step 8: Monitor Your App in the Azure Portal
Open the Azure Portal and navigate to your App Service to view detailed monitoring information, including usage statistics, the number of requests, and response times.
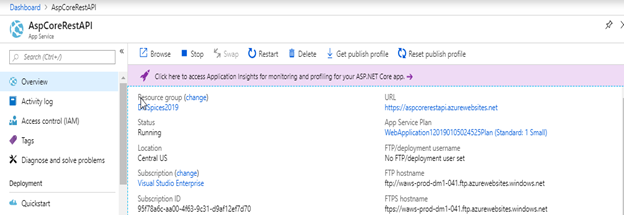 Figure 10 – App Service overview in the Azure Portal
 Figure 11 – Monitoring requests and response times
Summary
| Step | Action |
|---|---|
| 1 | Open the project in Visual Studio |
| 2 | Right-click the solution → Publish |
| 3 | Select App Service → Create New → Configure Advanced settings |
| 4 | Set the App Service name, Resource Group, and Hosting Plan |
| 5 | Skip SQL Database creation if already set up |
| 6 | Click Create to start the deployment |
| 7 | Fix the HTTP 500 error by adding a web.config file |
| 8 | Republish and verify using Swagger UI |
| 9 | Monitor the app via the Azure Portal |
That's it! You have successfully deployed your ASP.NET Core Web API to Azure App Service. If you found this guide helpful, feel free to share it or leave a comment below.
Published on netkalon.com
Comments
Be the first to comment.