How to Use the SQL Helper Class to Create Web APIs
AI links open with a title + excerpt (these tools can't fetch the page themselves) — use "Copy full article" to paste the complete text for a fuller summary.
The SQL Helper class is used in the Data Access Layer, which interacts with a database with the help of connection strings provided. It contains several methods, as shown below. And it improves the performance for the Business Layer and Data Access Layer.
-
ExecuteNonQuery -
ExecuteDataset -
ExecuteDataTable -
ExecuteReader -
ExcuteScalar
ASP.NET Web API
The ASP.NET Web API is a framework for building Web APIs on the top on the .NET framework, which makes it easy to build HTTP services for a range of clients, including mobile devices, browsers, and desktop applications.
Web API is similar to the ASP.NET MVC, so it contains all MVC features:
- Model.
- Controller.
- Routing.
- Model binding.
- Filter.
- Dependency injections.
Create Web API
Open Visual Studio 2017.

Go to the New menu and create a new project.
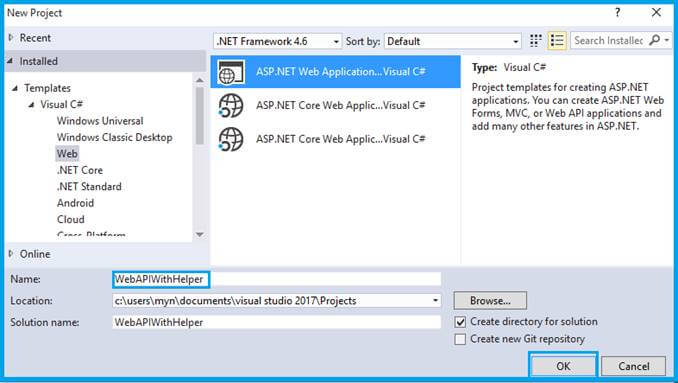
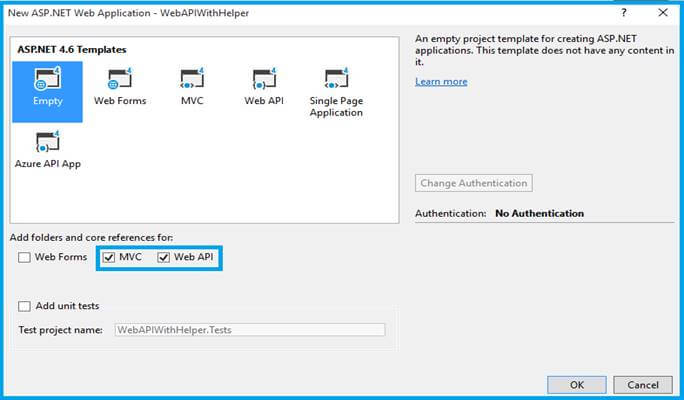
In the New Project menu, select the ASP.NET Web Application on Framework 4.6. Enter the name of the project in the Solution name text box and click the OK button.
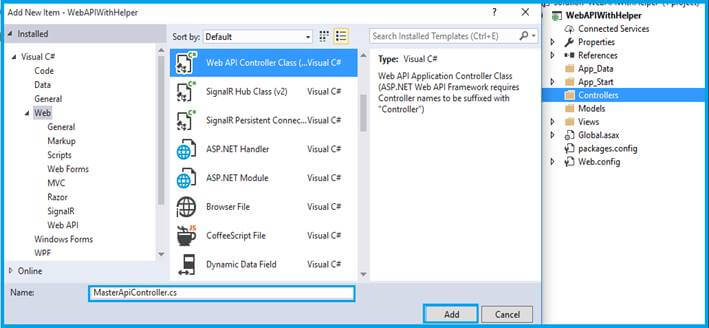
Once the project is created, add a new API in the Controllers folder. Right-click on Controllers > Add Controller. Now, add a scaffold and create an API Controller named MasterApiController.
Helper Class
Create a new folder called Helper in Solution Explorer. Then, paste the below code in your class file.
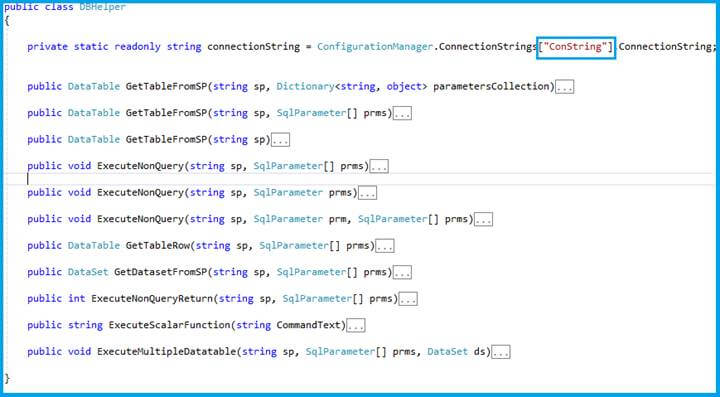
Follow the connection string name in the web.config file.
private static readonly string connectionString = ConfigurationManager.ConnectionStrings["ConString"].ConnectionString;
Write Web.Config File
I am accessing my local database in the web.config file.
Create a new database, table, and producer. Just use the below query.
USE [ABCDB] G /****** Object: StoredProcedure [dbo].[PC_EmpMaster] Script Date: 7/22/2017 1:20:35 PM ******/ SET ANSI_NULLS ON GO SET QUOTED_IDENTIFIER ON GO CREATE PROCEDURE [dbo].[PC_EmpMaster] @Row_id BIGINT=NULL, @MODE VARCHAR(10)=NULL AS BEGIN SET NOCOUNT ON; IF(@MODE ='GET') BEGIN SELECT Row_id,Emp_Code,Emp_FName,Emp_Status,CONVERT(VARCHAR(12),Emp_DOB) AS Emp_DOB,Emp_Maritalstatus,Emp_Profilestatus,Emp_Expriance,Create_By,CONVERT(VARCHAR(12),Create_Date) AS Create_Date FROM EmpMaster END ELSE IF(@MODE ='GETBYID') BEGIN SELECT Emp_Code,Emp_FName,Emp_LName,Emp_Role,Emp_Department,Emp_Address FROM EmpMaster WHERE Row_id=@Row_id END SET NOCOUNT OFF; END GO /***** Object: Table [dbo].[EmpMaster] Script Date: 7/22/2017 1:20:35 PM ******/ SET ANSI_NULLS ON GO SET QUOTED_IDENTIFIER ON GO SET ANSI_PADDING ON GO CREATE TABLE [dbo].[EmpMaster]( [Row_id] [numeric](18, 0) IDENTITY(1,1) NOT NULL, [Emp_Code] [varchar](10) NULL, [Emp_FName] [varchar](50) NULL, [Emp_LName] [varchar](50) NULL, [Emp_Status] [bit] NULL, [Emp_DOB] [datetime] NULL, [Emp_Maritalstatus] [varchar](10) NULL, [Emp_Role] [varchar](50) NULL, [Emp_Department] [varchar](50) NULL, [Emp_Address] [varchar](500) NULL, [Emp_Profilestatus] [int] NULL, [Emp_Expriance] [int] NULL, [Create_By] [varchar](50) NULL, [Create_Date] [datetime] NULL ) ON [PRIMARY]
Simply insert some employee details in this table:
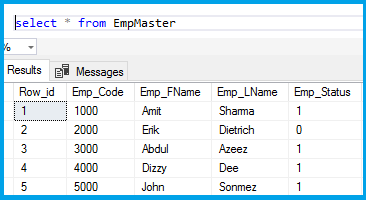
Create an EmployeeVM model class and convert as a list.
public class EmployeeVM
{
public List
Create a SQL Data Access class MasterImplementation in the Implementation folder.
public EmployeeVM GetEmployeeDetails(EmployeeDetails empDetails)
{
EmployeeVM vmGetGrid = new EmployeeVM();
SqlParameter[] prms = new SqlParameter[2];
prms[0] = new SqlParameter("@Row_id", "");
prms[1] = new SqlParameter("@MODE", "GET");
DataSet ds = new DataSet();
ds = (new DBHelper().GetDatasetFromSP)("dbo.PC_EmpMaster", prms);
if (ds != null)
{
if (ds.Tables[0].Rows.Count > 0)
{
vmGetGrid.loadEmployeeList = ds.Tables[0].ToList
[HttpGet] #region GetEmployeeDetails public HttpResponseMessage GetEmployeeDetails(EmployeeDetails empDetails) { try { var Response = EmployeeMaster.GetEmployeeDetails(empDetails); var Result = this.Request.CreateResponse(HttpStatusCode.OK, Response, new JsonMediaTypeFormatter()); return Result; } catch (Exception ex) { HttpError Error = new HttpError(ex.Message) { { "IsSuccess", false } }; return this.Request.CreateErrorResponse(HttpStatusCode.OK, Error); } } #endregion
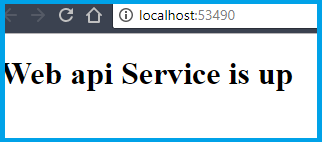
Create an HTML file and set this as the start page.
Web api Service is up
Once running the application, the Web API REST services are ready for consuming.
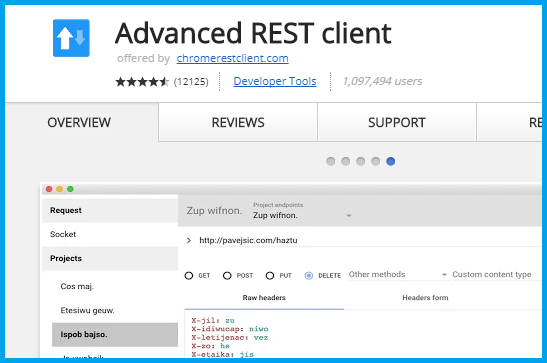
You can easily check the custom HTTP request using an advanced REST client. After downloading, open it from your Chrome Apps List.
Enter the correct URL and select the right HTTP verbs on the header.
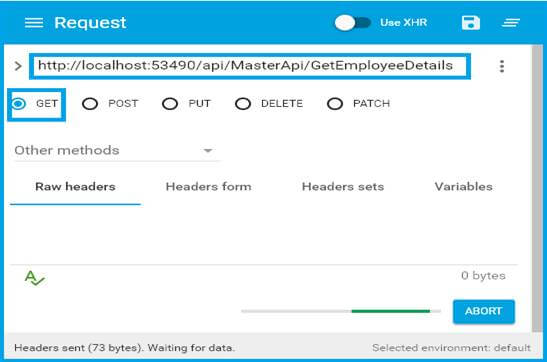
Once you click Send, it should hit the Web API Service.
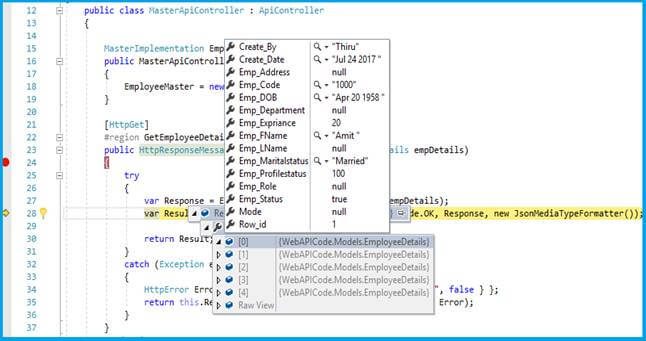
Finally, the Web API is working perfectly. You get your result in JSON format and RESTful connection.
Conclusion
In this article, we have seen the technique of using the SQL Helper class in building Web APIs. If you have any queries, please tell me through the comments section.
Happy Coding!
Comments
Be the first to comment.